

Using Dubsado to Automate Engagement Sessions
If you are a photographer who is trying to utilize Dubsado to automate portions of your workflow – you are not alone! Dubsado has many amazing automation features that can help streamline your process and make things run more efficiently. Using Dubsado to automate engagement sessions is one of the many ways you can leverage the system to work while you rest – and that’s what we are going to focus on today!
Whether engagement sessions are standard to all of your packages, or they are added on, doesn’t matter! You can still use Dubsado to automate engagement session bookings, and reminders, and even send out helpful tips to ensure your clients are prepared and come ready to slay.
Step 1: Write out your engagement shoot process
Maybe your process looks something like this:
- Schedule session
- Send questionnaire (confirm location, pets, props, etc)
- Send booking confirmation email
- Send reminder email
- Shoot session
- Edit session
- Deliver session
Now that you know your process, you know the elements you need to create within Dubsado to automate engagement session bookings!
Based on the process above, your Dubsado content list would look like this:
- Engagement session scheduler
- Engagement session questionnaire
- Confirmation email
- Reminder email
- Gallery delivery email
Step 2: Write your Canned Emails
The next piece in the Dubsado puzzle is to write your canned emails. In this case, you might want the following emails:
- Schedule your engagement session
- Your engagement session is confirmed
- Engagement session reminder
- Here is your engagement session gallery
Step 3: Create an Engagement Session Questionnaire
The questionnaire will be used to gather information regarding location, whether pets are coming, and any other information that you need for the session.
Step 4: Create the Engagement Session Scheduler
The scheduler will give your clients access to your calendar to book the session. Be sure to only include times that you are available and want to shoot. For example, you may want to exclude sessions over lunchtime due to harsh lighting or you may only want to shoot during golden hour.
At this point, you will want to toggle to the “advanced” settings and may choose the add the Engagement Session Questionnaire as a form to your scheduler. Alternatively, you can send it via workflow later. Note: adding the questionnaire to the Scheduler Template, means that the session will not be booked until the form is completed. I would suggest keeping the questionnaire brief if you go this route, to ensure that they don’t panic and close the window when they need to fill it out!
The advanced settings tab is also where you can add your confirmation and reminder emails. THese emails should be attached in the workflow and not via a separate workflow.
Step 5: Send the Scheduler to your Client
To send your Scheduler to the client so that they can book their engagement session, you have a few options!
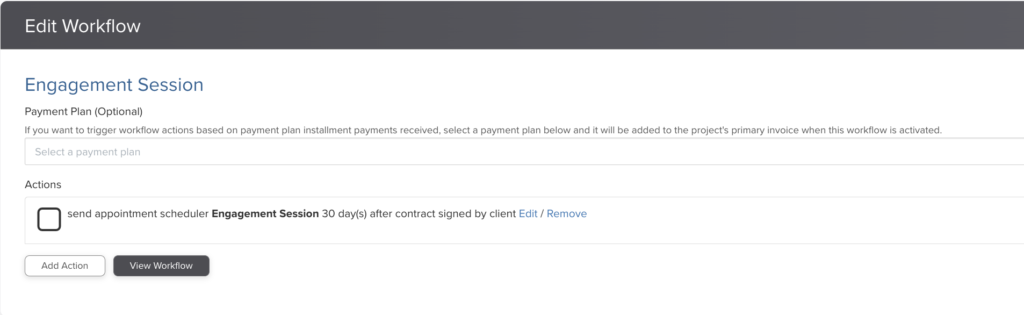
First, you can send this to them via workflow automation. In order to do this, you will need to determine when you want the scheduler to send out to the clients. Perhaps you want it to send with their welcome package, or maybe you want it to send 30 days after they sign their contract. The workflow step might look something like this:
If you did not add your questionnaire to the scheduler, you will want to add an additional step in your workflow to ensure this sends out automatically as well. It might look like this:
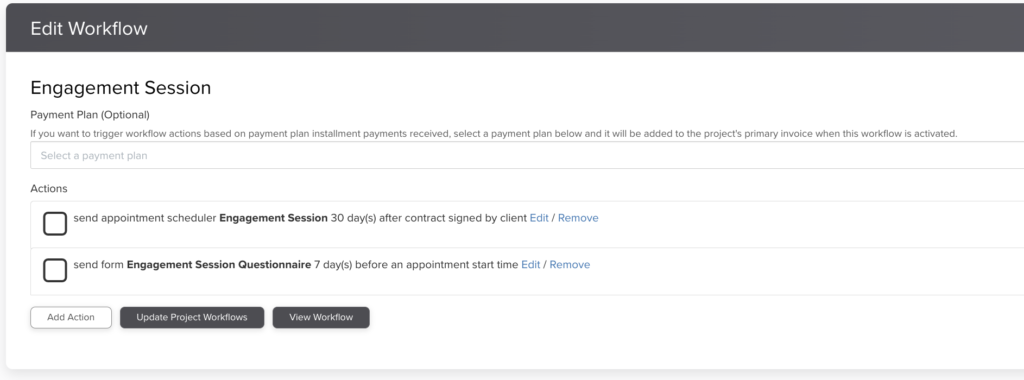
In the example above, the engagement session questionnaire will send 7 days before the engagement session takes place. You could also choose to send this immediately after the session is booked, or at a different time that is convenient for you.
Alternatively, you can choose to send the scheduler manually. To do so you will navigate to the client project and click the “Appointments” tab.
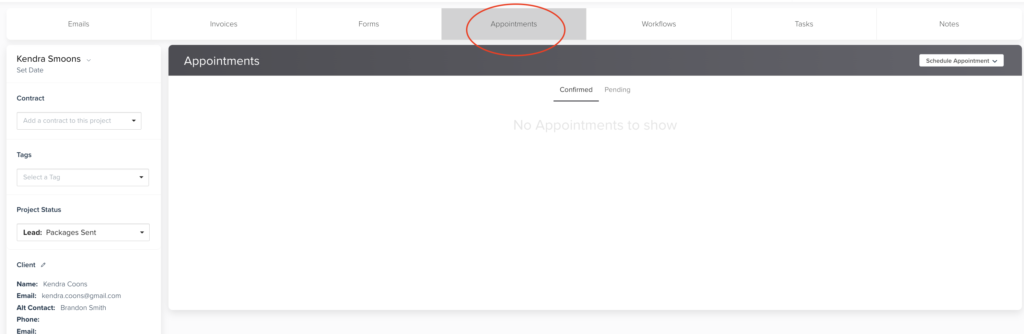
From here you will click the “Schedule Appointment” button on the right, selecting your Engagement Scheduler from the list of Existing Scheduler Templates.
A few notes:
If you are using Dubsado to automate engagement sessions for existing clients, be sure that you do not include a contact form in your scheduler. Attaching a lead contact form will create a new project instead of adding the appointment to the existing client’s project.
Still feeling stuck? Check out our Dubsado services that can help you get un-stuck here.
Want to save 30% on your Dubsado fees? Use the code confettiandco
")
")

")


